
Monthly trending articles on ConnectClue


Post updated on: Jun 4, 2025 8:15:54 PM
2. Once downloaded unzip the zip file. Make sure you have Java 8 already installed in your machine.
3. Now you can start the solr server. Solr comes with embedded Jetty server in it. So we can directly start solr server. Solr index all data in particular Collection which is also called Core. Solr provides some collection which are already created for us. We can see the present collection in the folder --solr-8.6.2\example.
Whenever we restart solr then we need to add the name of the collection.
4. Go to folder location --\solr-8.6.2\bin and run the below command to start solr with techproducts collection
- solr -e techproducts
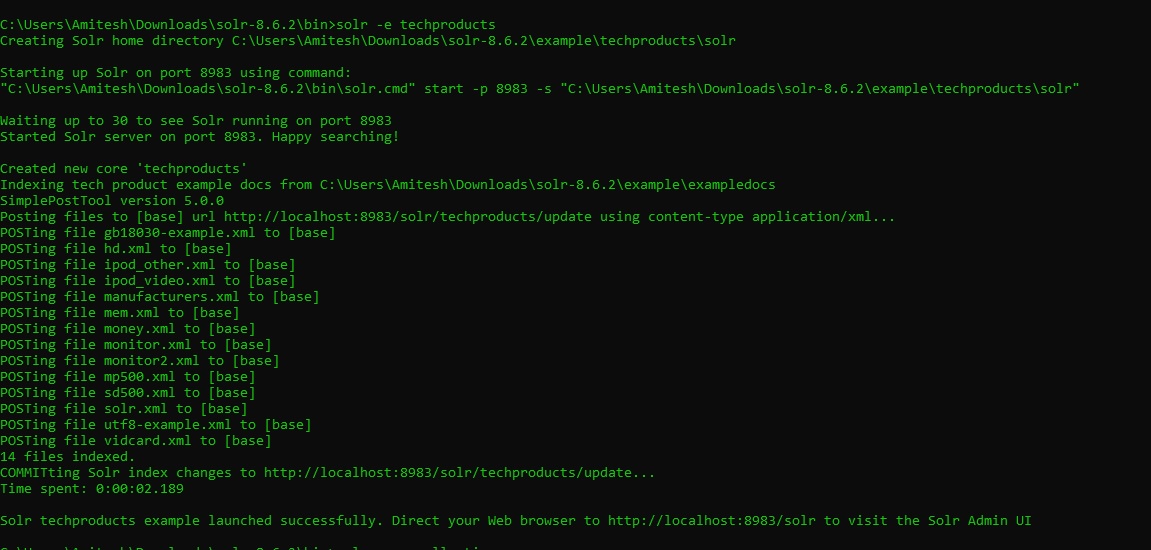
5. Once solr is started with the above message shown in screen shot then we can hit the below url to see the solr Admin UI page
http://localhost:8983/solr/#/
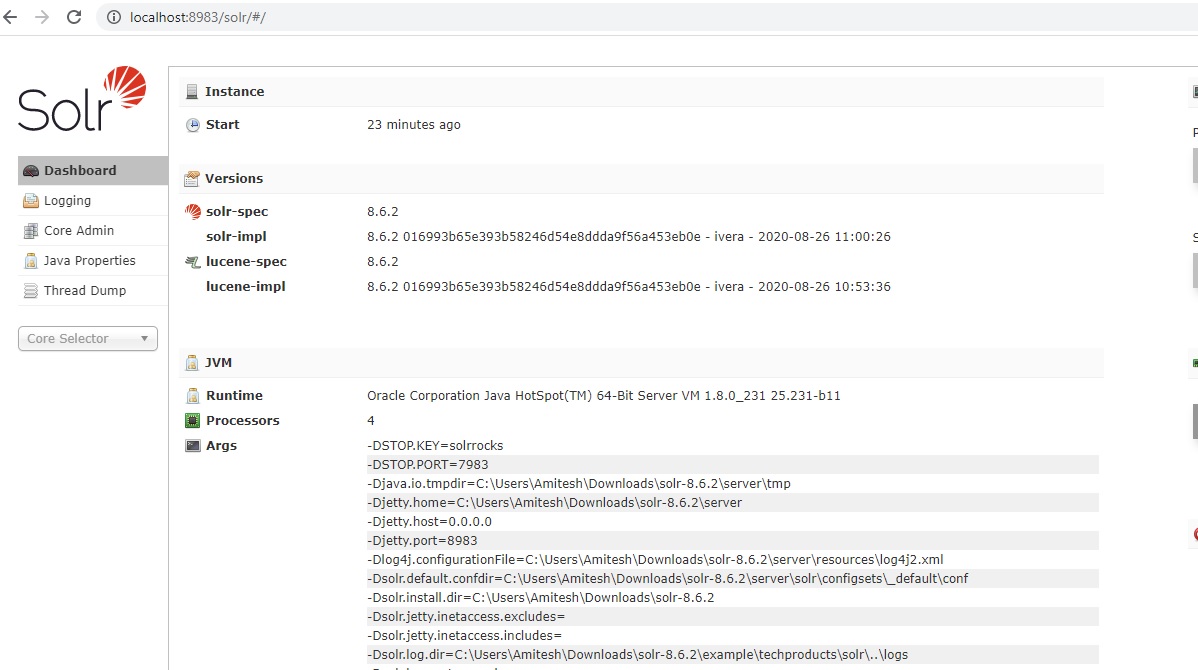
6. If you see the above screen shot then it means that solr is running and it's restarted successfully.
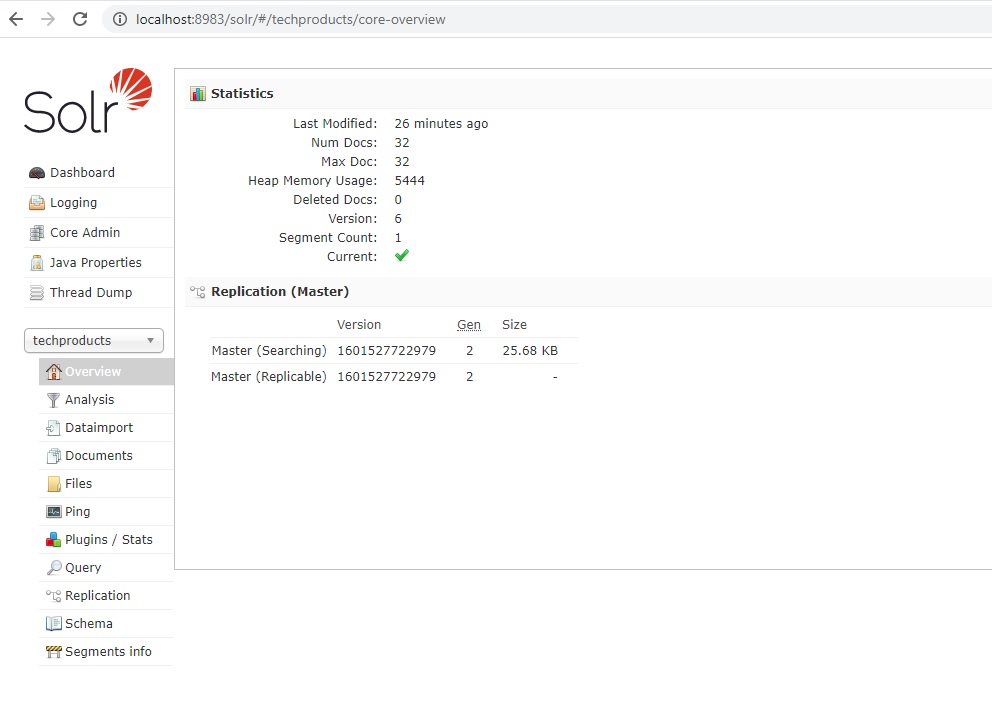
7. Now click on Core Selector from left side and you can see techproducts in dropdown. Select techproducts.
8. You can see all configuration for this collection techproducts.
9. Click on Query tab from left panel and then click on the "Execute Query" button
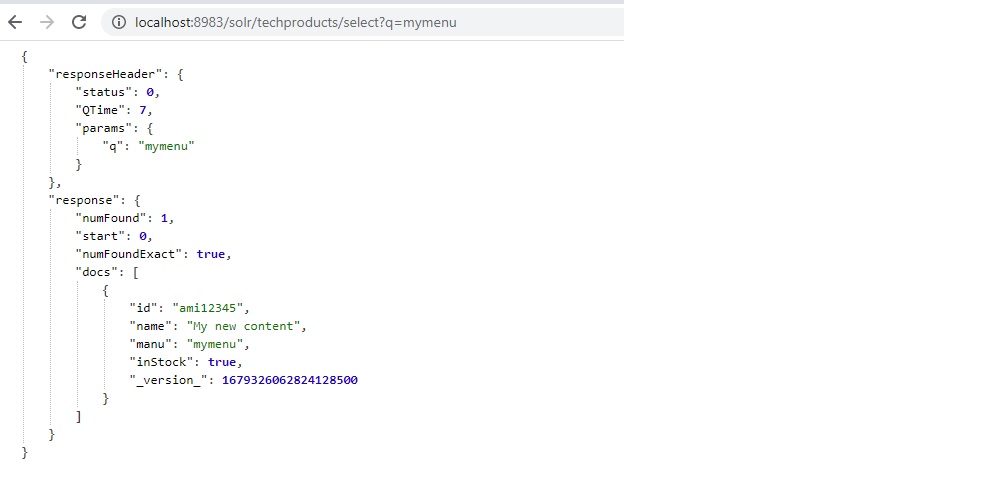
10. You can see the results for the data indexed in solr. You can try this query in separate browser to see the search result.
http://localhost:8983/solr/techproducts/select?q=*%3A*
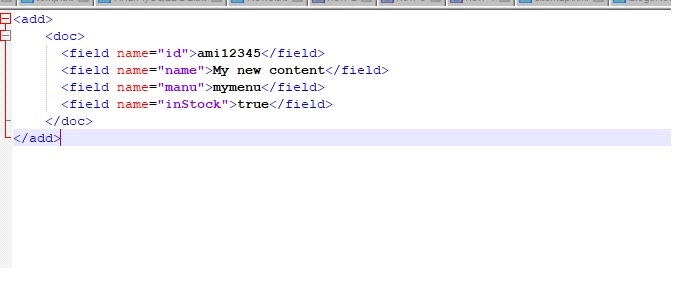
11. For adding new item in solr, add new content in XML file under \solr-8.6.2\example\exampledocs OR create a new XML file we your new content like below.
I have created a new file myfile.xml and added below data in that file
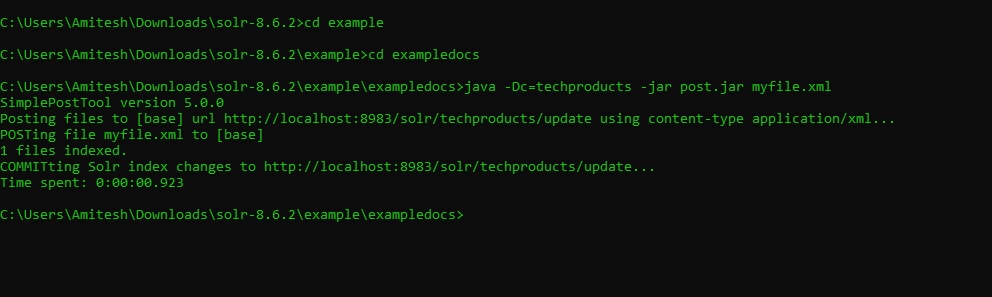
12. Now index this new data in solr by below command.
Go to folder example/exampledocs and run this command. At this folder post.jsr is already present.
- java -Dc=techproducts -jar post.jar myfile.xml
14. You can shut down solr. Go to folder location --\solr-8.6.2\bin and run the below command
- solr stop
Happy learning!!
Post updated on: Oct 11, 2020 11:50:32 PM
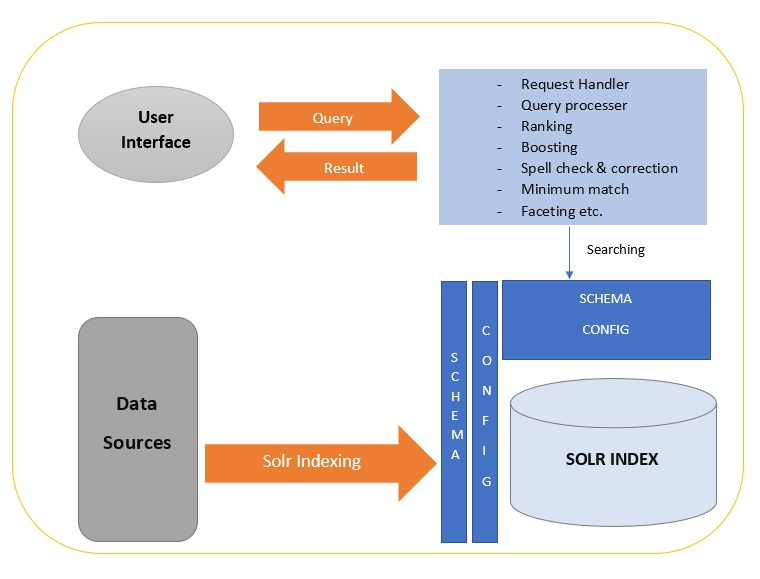
Solr is the popular, blazing fast open source enterprise search platform from the Apache Lucene project. Its major features are: powerful full-text search, hit highlighting, faceted search, dynamic clustering, database integration, rich document (e.g., Word, PDF) handling, and geospatial search. Solr is highly scalable, providing distributed search. Solr is written in Java and runs as a standalone full-text search server within a servlet container such as Tomcat. Solr uses the Lucene Java search library at its core for full-text indexing and search, and has REST-like HTTP/XML and JSON APIs that make it easy to use from virtually any programming language. Solr's powerful external configuration allows it to be tailored to almost any type of application without Java coding, and it has extensive plug-in architecture when more advanced customization is required.
Lucene uses 3 to 5 times less memory for when dealing with terms dictionary, so it's even less RAM consuming. So it provides quick search.
Faceted Searching.
Light weight application.
Schema.xml: This file is responsible to declare all fields of data feed with their type and scope for search. It first declare the data type which can be used for fields. It defines the field types and fields of documents. It can drive more intelligent processing Dynamic Fields enables on-the-fly addition of new fields in this field. CopyField functionality allows indexing a single field multiple ways, or combining multiple fields into a single searchable field. Explicit types eliminates the need for guessing types of fields. We can also provide customized data type . In that case we are required to create concerned class and need to point that class in the declaration of the data type .
It makes possible to specify that a field is a String, int, float, or other primitive, or a custom type.
It has a feature of Dynamic field definitions. If a field name is not found, dynamicFields will be used if the name matches any of the patterns. e.g. name="*_i" will match any field ending in _i (like myid_i, z_i). Longer patterns will be matched first. If equal size patterns are found then the first appearing in the schema will be used.
Solr Faceted Search Implementation:
Faceted search gives the facility to dig our searching upto bottom level. In the respect of user this helps to search from category to sub category and many more. Each facet displayed also shows the number of hits within the search that match that category. Users can then "drill down" by applying specific contstraints to the search results. Faceted search is also called faceted browsing, faceted navigation, guided navigation and sometimes parametric search.
It's relatively simple to get faceting information from Solr, as there are few prerequisites. Faceting commands are added to any normal Solr query request, and the faceting counts come back in the same query response. Solr offers the following types of faceting, all of which can be requested with no prior configuration:
Field faceting - retrieve the counts for all terms, or just the top terms in any given field. The field must be indexed.
Query faceting - return the number of documents in the current search results that also match the given query.
Date faceting - return the number of documents that fall within certain date ranges.
The current Index Searcher serves requests and when a new searcher is opened, the new one is auto-warmed while the current one is still serving external requests. When the new one is ready, it will be registered as the current searcher and will handle any new search requests. The old searcher will be closed after all request it was servicing finish. The current Searcher is used as the source of auto-warming. When a new searcher is opened, its caches may be prepopulated or "autowarmed" using data from caches in the old searcher.
Required attributes in caching.
Available SolrCache Class for implementation:
solr.LRUCache
solr.FastLRUCache
solr.LFUCache
initialSize
The initial capacity (number of entries) of the cache.
autowarmCount
It is responsible to get the searched data from old cache instead of hitting solr.It defines the size or how many data can be cached. When a new searcher is opened, configurable searches are run against it in order to warm it up to avoid slow first hits. During warming, the current searcher handles live requests.When a new searcher is opened, its caches may be prepopulated or "autowarmed" with cached object from caches in the old searcher. autowarmCount is the number of cached items that will be regenerated in the new searcher. You will proably want to base the autowarmCount setting on how long it takes to autowarm. You must consider the trade-off ? time-to-autowarm versus how warm (i.e., autowarmCount) you want the cache to be. The autowarm parameter is set for the caches in solrconfig.xml.
This is Cache warming in background
class="solr.LRUCache"
size="512"
initialSize="512"
autowarmCount="0"/>
Caches configuration is view on static page of solr for a running Solr server.
Url for static page is http://localhost:8983/solr/admin/stats.jsp
Highlighted context snippets can be used.
Faceted Searching based on unique field values, explicit queries, date ranges, and numeric ranges is key feature of Solr. Spelling check and auto suggestions are also provided for user queries, in that case it is required to manipulate solrConfig.xml for spelling check.
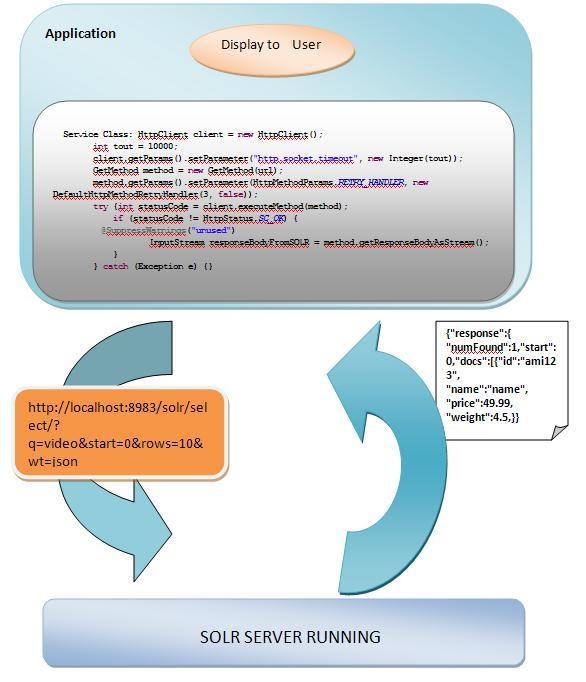
Queries are creating using simple java code but one can use solr API apache-solr-solrj-1.4.1.jar. Inbuilt class SolrQuery is responsible to create queries. Its different methods can be used to append different parameters in query. The above API can be used for parsing response data also or one can write own code for parsing/handling response data.
Query Example:-
Basic Parameters of Solr Query:
- q: This is the basic parameter in solr query which contains the searched content.
- Start: This parameter is used to paginate results from a query.
- Rows: This parameter is used to paginate results from a query.
- Fq: This parameters contains the condition applied on the search query.
- Fl: This parameter can be used to specify a set of fields to return, limiting the amount of information in the response.
- Sort: This parameter says that we need the response in sorted form asc/desc on a particular field basis.
- Facet: It defines weather facet search is true/false on the particular call.
- Wt: The value of this parameter defines the format of solr response.
Post updated on: Oct 1, 2020 1:51:34 AM
This steps are tested on Ubuntu 16.04. I have listed down some basic Linux commands also which you should be aware of.
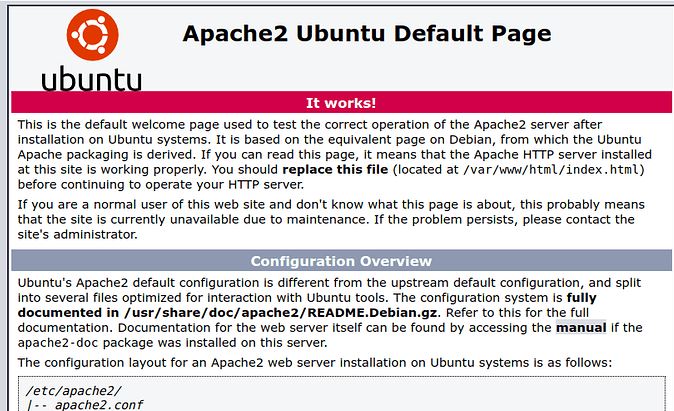
- sudo apt install apache2
- localhost:80/
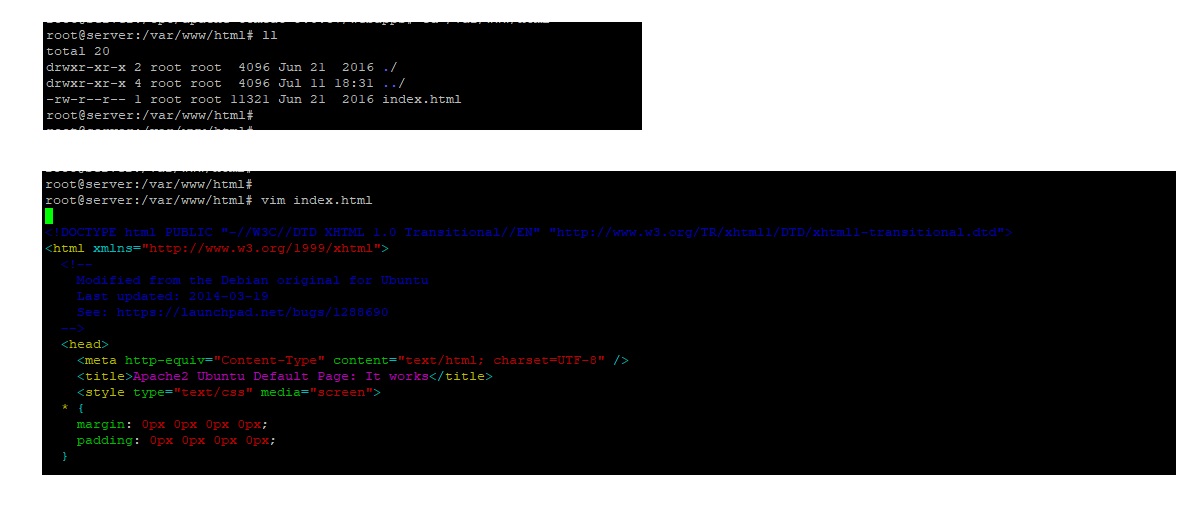
- cd /var/www/html
Open and Edit file
- vim index.html
Type "i" to enter insert mode.
Press ESC and then type ":wq!" then press Enter to save the changes and exit vim.
nano index.html

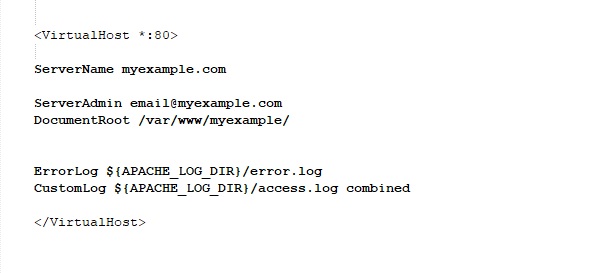
cd /etc/apache2/sites-available/
sudo nano myexample.conf
Add the email address in ServerAdmin email@myexample.com
Add the server name as ServerName myexample.com
Add the Document for the folder which you had already created
Happy learning!!
Post updated on: Sep 5, 2020 10:02:42 PM
Discover your area of interest
Advertisement
Art & entertainment
Astrology & spirituality
Cooking
Culture
Current affairs
Education
Fashion
History
Hotel management
Industry
Medical & fitness
Motivational
Politics
Real life stories
Sports
Story & poetry
Technology
Top in search
Tourism
More recent categories
Medical(Public)
By: Admin
Sunflower Oil Wholesale(Public)
By: eco
Development (Public)
By: M40Tech
crypto token development (Public)
By: Sneha
Real Estate(Public)
By: Sandeep
Agriculture(Public)
By: Tractor
Blockchain & Crypto Solutions(Public)
By: Sneha
Where to Buy Gold in Africa Sa(Public)
By: sominkigold
Honda Tillers(Public)
By: Equipment
Honda Trimmers(Public)
By: Equipment
Working on delete request.

Please wait!!